After running our successful fodder system for six months we decided to make some much needed improvements. We have found that the plastic trays crack pretty easy when the trays are holding fully grown fodder. Replacing the trays on a monthly basis was getting costly and we looked for a more permanent solution. We also were hand watering all the trays and it was adding to our daily chore time. Also, when it came to drainage the trays were not as exact as I wanted and we ended up with a slightly muddy floor on occasion.
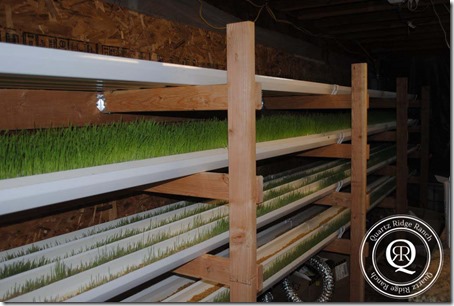
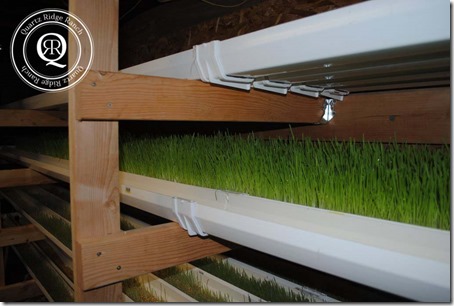
After doing some research on various fodder systems we decided to use rain gutters for the hardware store. We found that two 20 foot rain gutters was a little more than the 6 trays of fodder we were producing. We used a wood frame to support the gutters and made sure that they were set at an angle of 1.5” drop every 10 feet. So, for our 20 foot span the height difference between the two ends is three inches.
d
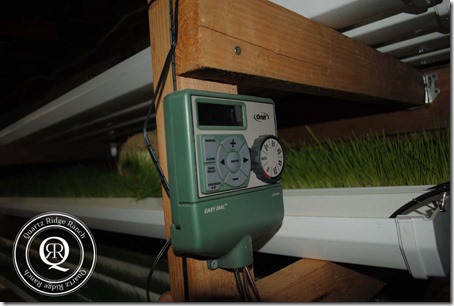
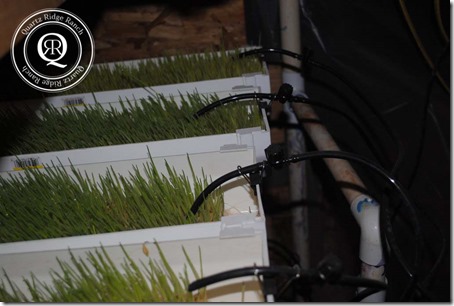
On the higher end of the gutters we have an automated watering system. We are using a a sprinkler timer set to go off every 6 hours for 12 minutes. Pretty much we run enough water through the system so we have clear water coming out the other end. It will all depend on your gutter or tray size, your angle and your drainage. So make sure that the entire length of the fodder is getting a good rinsing.
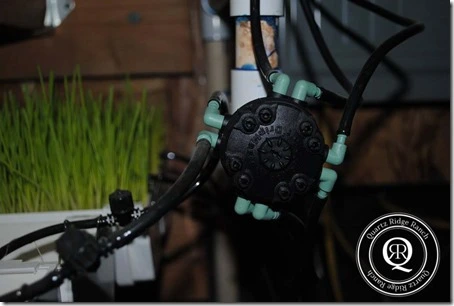
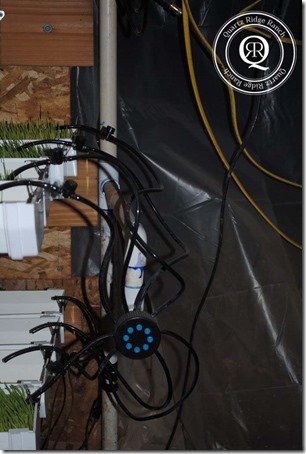
Using PVC plumbing we have the water flow into an Orbit Adjustable Flow 8-Port Drip Irrigation Manifold for 1/4″ Tube.
The manifold allows us to direct the water into the gutters using 1/4” drip line. The manifold shown in the photo below is not one I would suggest due to it leaking.
The manifold allows us to direct the water into the gutters using 1/4” drip line. We also placed an in-line control valve on the 1/4” drip line so we can stop the flow of water the night before we harvest the fodder so it is not dripping wet. We have them attached with fancy binder clips. I have seen people drill holes in the end caps to put the drip line through but we wanted to be sure everything can be adjusted if needed.
The gutters are attached together using the coordinating parts from the home improvement store. Since we did a 20 foot span we had to put one connection and two end caps per gutter. This does get pricey BUT the cost of trays every month were getting to be a lot more. You can see the gutters we used here, and the coordinating joiner and end caps. Total we spend $25 on each gutter. We had been replacing approximately 30 trays a month at $2 each…so $60 a month in disposable trays over six months of growing fodder so far. We were basically throwing money away.
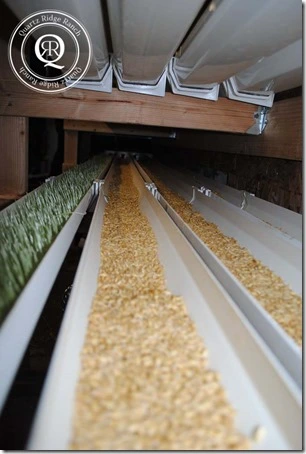
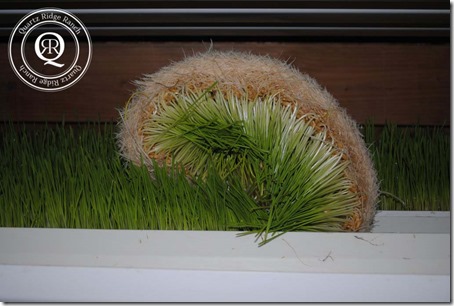
Here is a view down the fodder channel. We try to pour the seeds as even as possible to get a nice even mat at the end of the growth cycle.
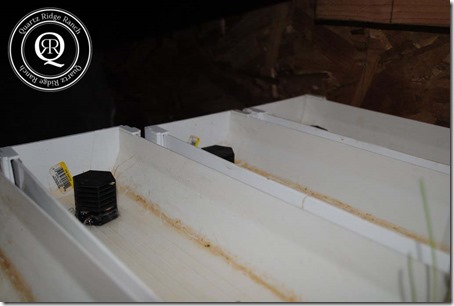
At the end of the gutter, we have placed a bulkhead screen and washer to let the water drain out properly. You can find them at FarmTek or your local nursery. They are screwed into a PVC threaded-T and allows for the water to drain out via a PVC system. We have ours going out to the garden so we can recycle the water. I do NOT suggest recycling your water back into your fodder system as there is a lot of starch that comes of the seeds as they sprout. It will cause mold and slime issues.
We have found that some water pools at the end of the fodder tray and so we keep the seed back a bit from the drain to prevent mold or fermentation. It has worked so far and allows the fodder to stay fresh. At harvest, after 8 days, we roll the mat up and then cut it every few feet. It is then taken out to the animals to eat.
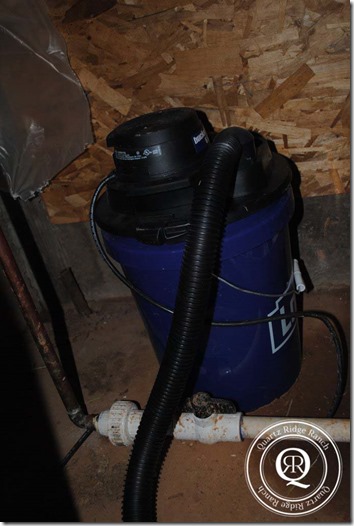
After we harvest the fodder, I turn the in-line valves back on and let the water flow a bit while I take a scrub brush with a bit of dawn soap and clean the gutter. At the end I use a bucket vacuum to suck anything that is left to make sure the trays are clean and sanitized. If you are having a problem with slime or mold it is a good idea to sanitize your trays or gutters with hydrogen peroxide or vinegar.
If you have not seen our fodder routine you can read our blog post. The only thing we do differently now is put the seeds into the gutters instead of trays. I think in total it takes about 30 minutes out of my day to feed twice it twice a day. Most of the time is spent on cleaning the gutters to prevent mold.
Here is one of our many mischievous Muscovy ducks that likes to sneak into the fodder room and eat their way to fatness!


I love ingenuity! A great idea for growing fodder! How much grain do you put in each gutter?
We are using 7lbs of seed for two 20 foot gutters. Thank you for the complement!
Looks great, I have now put a much smaller setup, in a bathtub. I have nail holes in the growing trays. I pour a gallon and a half over the top tray and it filters down to the other trays and goes out the drain. I had a set of small plastic shelves, that had grids and I thought I would try it. It works and that is what matters. Before the trays were all over the kitchen floor. I use there top covers to catch the water run off. But getting the water out of the catching trays was a mess. I am so happy that I found your board. I have another friend that has started their own fodder growing trays for their chickens. Thank again.
Just listened to the interview on The Survival Podcast. Great info on your ranch and your system. We are just up 49 from you in Grass Valley so it was really interesting to know all that you talked will definitely work here. Thanks!
Hi Nancy! We are practically neighbors. If you need any help with design or if you have general questions give us a call. We would love to help.
Your blog and podcast interview has definitely inspired me to begin building a fodder system for our goats. Sprouting seed for a sandwich is one thing. The thought of producing fodder for my girls seemed out of reach$$. thanks for giving me a place to start.
Thanks! I hope that you can create something for your girls. I have seen lots of great ideas for growing fodder. It definitely isn’t a cookie cutter type project. If you have any questions please feel free to contact us!
This is awesome! My 24 chickens would love this. However, Interior space for us is a premium; can this system be set up and grown outdoors in the Spring, summer and Fall in the Northeast?
It has to be in a temperature controlled environment. You will be fighting mold issues if it gets too hot. The best temperature is between 65-68 degrees.
Thanks for sharing what you are doing here. We have horses and chickens (thinking about sheep or goats) and I am going to give your setup a try. I know you said you use 7 lbs of soaked seed per 20 foot gutter section – how much fodder (in lbs) does that produce for you? Just trying to size a system for our 4 horses and 12 chickens.
We are getting approximately 60lbs of fodder per day. So about 30lbs per 20′ gutter.
This is fantastic! Thanks so much for posting this.
Hi,
Thanks for your post. How many pounds of fodder do you produce daily?
Thanks,
Lance
We produce 50-60lbs a day in two gutters. When we build our other side of the system we will be up to 100-120lbs/day.
Hi Teresa,
your podcast really inspired me. I have begun following your example (in a much reduced capacity) at my home in Tasmania, Australia. I posted about in my most recent blog post at http://littletassieprepper.com.
Once I have the system sorted I hope to emulate your example.
Thanks again for the inspiration.
That is so great! I am glad we could help. I am going to check out your blog right now.
I can’t thank you enough for sharing what you’ve created. I’ll be getting started based on what you’ve done for my turkeys and ducks. I suspect they don’t like the dry food anyway. They prefer fresh food when ever it is provided to them. I’ll be experimenting with wheat, oats, millet, fengreek, and sunflower all sprouted seperately. There is a great sprout book by Isabell Shipard that I use to sprout seeds for myself (https://herbsarespecial.com.au/about-isabells-sprout-book.html). If there is one book I could save from a burning house, it would be this book. A website full of helpful information is http://sproutpeople.org/
Thanks for the great info. I have also been growing barely fodder for my gilt (hopefully now sow), chickens and ducks. We recently just built a larger flood and drain system with larger Rubbermaid trays (40qt) that we hope will feed the pig in the evenings.
We had 2 smaller fodder systems and 1 larger fodder system in an unfinished room (cement floor – no heat). We noticed the grains were not sprouting as rapidly as they used to when the outside temps where higher (70’s). We had to recently move these units indoors. Do you notice any problems with temps?
Also, they seemed to grow much better when having a light on them for 16+ hours. What are your experiences with light and do you use light? If so, how long do you keep it on?
We found that the if the temperature is too low you get stalled germination. If it is too hot you get mold. There is a perfect temperature and I believe it depends on your grow room. We use a propane heater in winter to make sure it is warm enough in the fodder room. It basically takes the chill off. We are at 3600 feet in the Sierra Nevadas so our temperatures can drop pretty low.
We use lights on the fodder that are on a timer. They are nothing special and we purchased them on amazon. I think I have a link on one of my posts. They are kept on for 12 hours and I agree the light helps with growth during the last few days.
***here is the link to the lights we use. They are great as far as power consumption goes and work well for this use. http://www.amazon.com/gp/product/B007HZB4MO/ref%3Das_li_ss_tl?ie=UTF8&camp=1789&creative=390957&creativeASIN=B007HZB4MO&linkCode=as2&tag=quaridran-20
Hey nice set up !
Do you have problem of mold growing?
and why do you set the fodder at an angle of 1.5” drop every 10 feet?
Thank you
No issues with mold as long as your setup is clean, your seeds are clean and you have the correct temperature and humidity.
The angle of the gutter system just worked out so that the water slowly drained without pooling. It isn’t an exact science it just worked for us.
Hi Teresa
Thank you for your reply.
Do you put any nutrient solution into your system?
or do you just grow them using water?
Thank you
Philip
No nutrients are needed because you are only sprouting the seed. A seed has all the nutrients enclosed to sprout. Once it is done sprouting it will need nutrients to survive but it is fed long before that.
We just use water! That is the best part of growing fodder. If you were growing other items like vegetables they will need nutrients as they use up all the stored food in the seeds the first week.
Hi Teresa, You are very inspiring and down to earth! A few fodder questions: Can I mix seed types in the same batch for more diversification? Can I stop feeding my chickens bagged feed all together if I feed fodder and have them on pasture? Can chicks live on fodder or do you have to use starter? How much should one figure to grow per adult chicken? Thanks for everything! r
You can mix seed types but you will run into the issue of different germination rates. For instance, alfalfa takes longer to sprout than barley. The barley will be fully sprouted and the alfalfa will still need some time. I recommend doing different smaller batches and then mixing them as you feed.
I have seen mixed results on stopping all bagged chicken feed and going over to fodder. Some feedback I have gotten is their chickens stopped laying. We never experienced that issue but I like to warn people. We also let our chickens out to eat naturally so I am pretty sure they were getting what they needed nutritionally.
I would still do chick starter as they are not ready for the size of barley seed or the blades of grass. I would offer chick starter and a small bit of fodder to get the best rate of growth and the healthiest chicks.
We feed 2% of the animal’s body weight in fodder or feed. So with chickens it is hard to say how much to give them. I would throw a 1020 seed tray out to layer chickens and we had a couple dozen of them. They were also free range so if they were hungry they would forage. Chickens seem to eat all day long!
Hope this helps!
Thanks Teresa! That helps a lot!
No problem!
How do you get 60lbs of fodder A DAY? If you harvest all the fodder from a gutter in one day, it will take 6-8 days to harvest again (from that harvested-then-immediately-reseeded gutter). Do you partially harvest a gutter, have more than one 2-gutter system, or what? I’m a little confused.
We get 60lbs a day from two gutters. We designed the system to have 7 levels and two gutters on each level.
I love your design with the gutters and am building something very similar. Could you put up a picture of how you attached the PVC to the bulkhead filters and what they drain into? Thanks!
You say that using PVC plumbing you have water running to the 8-port irrigation manifold. Can you post a picture of how you have that done? Also, since you are using the sprinkler timer, are you using sprinkler valves?